Wednesday, November 9, 2011

A final photo tour: the completed pavilion

The pavilion was completed in late October, just as the mornings were starting to get frosty.


I cannot help but step back and make note, again, of the remarkable generosity of the rare community of donors and volunteers who brought the building into being. Donors are noted in the right sidebar of the blog; volunteers are introduced throughout the course of the blog posts.


The final building reflects an incredible collective investment in a much-loved landscape, the vibrant community that gathers in it, and the desire to invite others to share in its richness.


And while this is the end of the pavilion's construction story, it is just the first chapter the stories to come.


Thanks for reading!

The finishing touches

Fall found us in the home stretch, with just the landscaping and roofing left to go. Below, Bob is peeling logs that will act as seating and informal steps in the "outdoor rooms" at the north and south of the pavilion.


Luckily, Dave had some timber-working tools he was willing to share for this task. This draw knife was a remarkable tool for removing bark.


Here, Dave and John begin to assemble the accessible entry ramp.


The ramp rests on a floating timber footing at its lower end, and is supported on floating dock hinges at the building edge. Jack gets ready to attach the ramp in place.


Dave and John construct beautiful rubble retaining walls along the entry path. In the background, Jack and and Bob secure sections of log in place.


John's exacting archeological excavating skills are evident in the perfect firepit he dug into the clay.


A small delivery of gravel allowed us to establish a dry area for gathering.


Carpenter Dave came by to bend and help install flashing at the roof.


The transparent acrylic roof allows light transmission but collects rainwater ...


that is then channeled out a scupper and down some drain chains ...


where it feeds into three large interconnected barrels, providing 600 litres of rainwater collection capacity.

Tuesday, November 8, 2011

Topping out!

Once again, the end frame was a substantial built-up element, so we had lots of hands on deck to put it in place. Thanks to Keegan for lending a hand that day, and to Amanda for capturing the process on camera!

With a "ready" ...


a "set" ...


a push ...


and a pull, we brought the frame upright...


and lifted it into place on the deck.


And then, of course, celebrated with high-fives all around!


Are you curious about the sprig of fresh cedar attached to the final roof beam? It's part of a practice is known as "topping out". Apparently, this custom of placing a bough or tree on the final beam of a building originated in timber framing traditions in Northern Europe. Unsupported information on Wikipedia suggests that "The practice of "topping out" a new building can be traced to the ancient Scandinavian religious practice of placing a tree on the top of a new building to appease the tree-dwelling spirits of their ancestors that had been displaced." Anecdotally, it has been described to me as a celebration of the structure and a symbol of longevity.


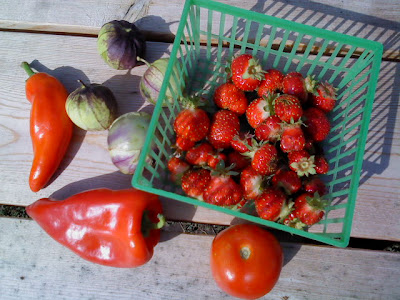
Traditionally, the tree ceremony is accompanied by a party with feasting and the like. While we didn't have a topping out party, we did have something of a daily lunchtime feast on fruits and vegetables from our garden plots in the Springbank community gardens adjacent to the building site. I couldn't resist documenting this beautiful selection of September treats.


Dave and Jack enjoy a break in the space.


Keegan peeks down the length of the tunnel created by the building's skirt.

Working toward the final heave-ho!

We set to work on making the final set of frames: 30 in total. By this point, our frame-making crew was a well-oiled machine.


Dave, Jack and John pose with the kill: the two big piles of frames stacked in the foreground and background, ready to be set into place.


The lumber piles gradually diminished and the building continued to grow...


... until we were ready to put the final frame in place.

Friday, September 23, 2011

Raising the roof and walls ... the first third of the process

One by one, we lifted the preassembled roof and wall frames into place and tipped them up to stand vertically. In other words, the building was built up through a process of horizontal stacking. Here Jack, Vincent, and John check the level of the first frame, while Dave starts to secure it at its base.


The first frame in place, framing the landscape.


The cantilevered benches are sandwiched and secured between the wall studs, so they are knit into the structure as it is erected. Below, Dave positions a bench member.


A view through two rough wall studs at the smooth bench surfaces as they begin to take shape.


At the beginning, work progressed slowly. We had four frames erected by the end of one day ...


... and six at the end of the next. Enough for Vincent to try out a bench for lounging.


One fine Saturday in early August: Darryl, Dave and John tip another frame into place...


... and continue to build up the benches.


At nine frames ...


... the interplay of the various structural members begins to become apparent.


John, Dave, Bob, and Jack get ready to pull another frame up into place.


Twelve frames ...


... and one can begin to get a sense of the patterning of light and shadow that will fall inside the space.


Here is a view of the pavilion from the garden, framed by magnificent August sunflowers.

At the north and south (pictured below) ends of the building, four wall studs are laminated together to make a column, reinforcing the structure against high winds. Bob, Jack, Amanda and John lift the final frame into place, while Devon and Dave use ropes to help lift and steady it. Since the cedar is quite light, this wasn't quite as hard as it might look!


Below, a tranquil Saturday morning sitting on the bench and looking over the valley. (Photo Darryl Nunn)